Introduction
Imagine you’re part of a software development team. You need to produce a new feature for your product, and it’s going to require database schema changes.
Ideally, you’d keep all of your diagrams up-to-date and version-controlled. This way, you can easily see what’s changed, who changed it, and when it was changed.
In an even better world, all architecture tasks would be tracked in a single place, so you can see what’s being worked on, what’s been completed, and what’s coming up.
This is all well and good, but we face a few key challenges:
- Architects are busy: Managing diagrams in source control can be a tedious and time-consuming process.
- Managing tickets is a pain: When you have to switch between your architecture tool and your ticketing system, it’s easy to lose track of what’s being worked on.
- Memorizing syntax is hard: Writing code to generate diagrams can be difficult, especially if it’s not something you do every day.
- Collaboration is key: You need someone to bounce ideas off of and give you feedback on your work.
In this guide, we’ll illustrate how you can use Workforce to overcome these challenges and streamline a version-controlled, collaborative, and ticket-driven architecture workflow.
This flow is a form of hybrid automation, where humans and AI work together to complete a task. The AI worker is responsible for “grunt work”, while the human worker is responsible for the creative and strategic aspects of the task.
This is also a demonstration of using AI to initiate a task, and then involving a human worker to complete it. Rather than going to the tool, the tool comes to you.
The Flow
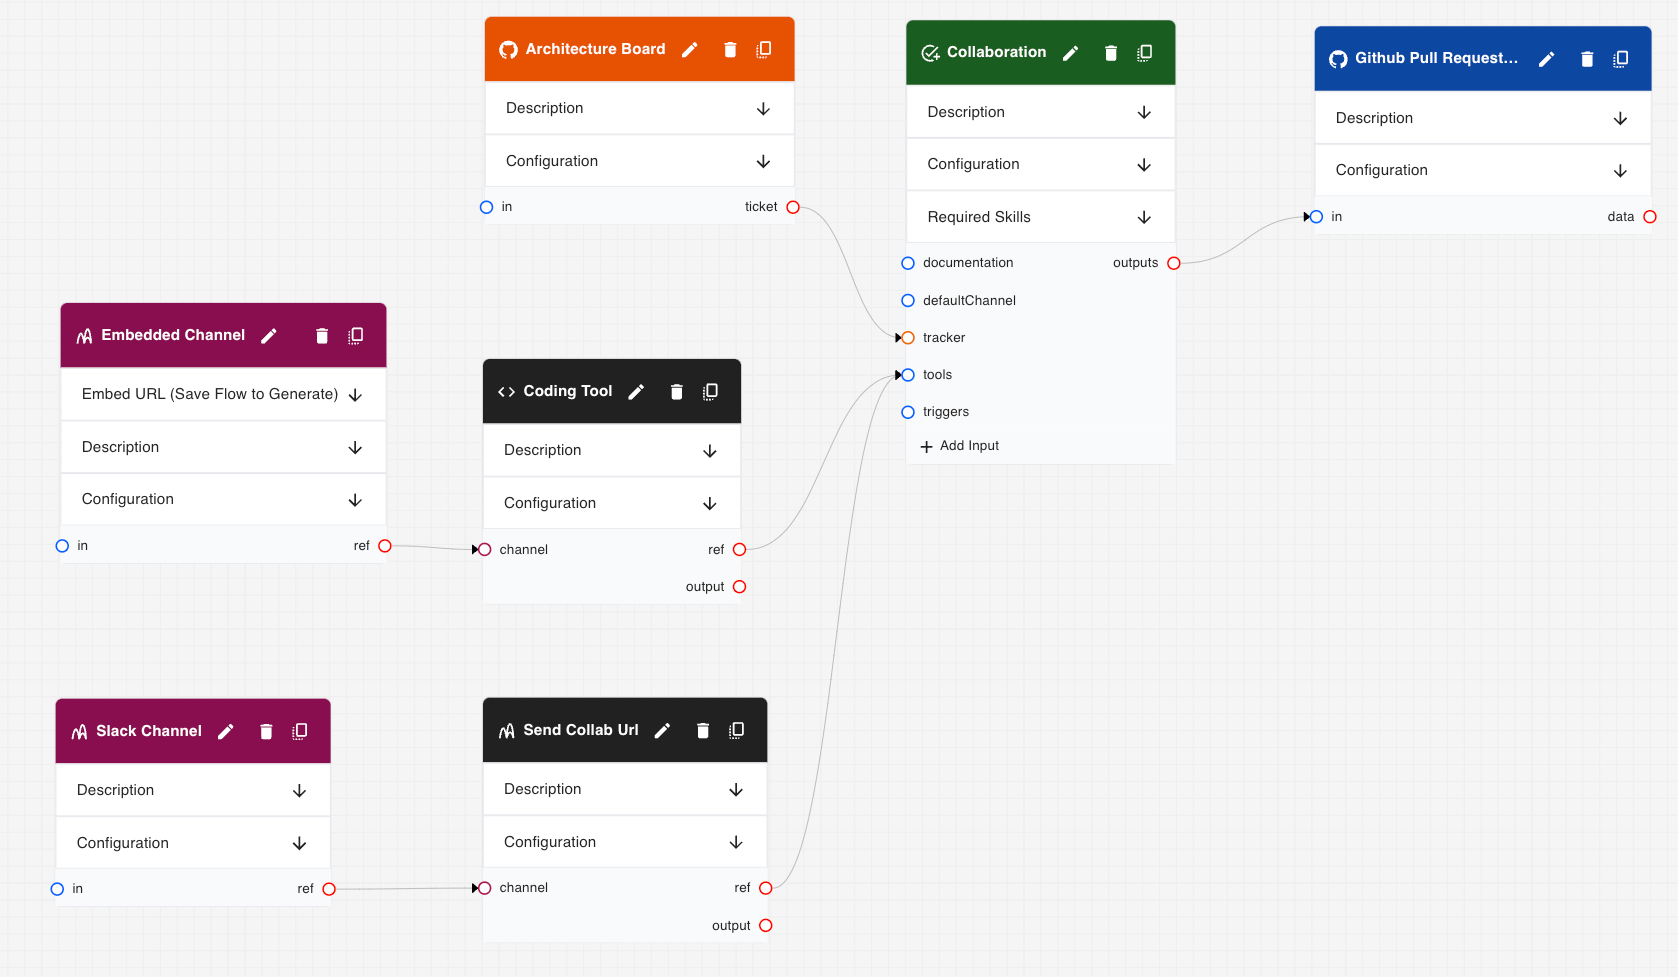
There are 7 components to this flow:
-
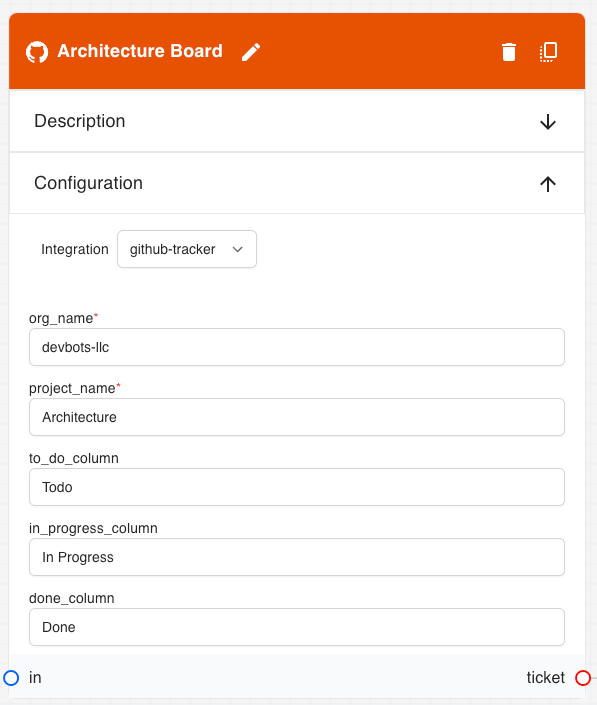
Architecture Board: The architecture board points to a github project board that contains all architecture tasks.
We add this as a tracker for the task, which gives the task access to ticket details in the template.
Workforce will automatically set up webhooks to listen for new tickets.
-
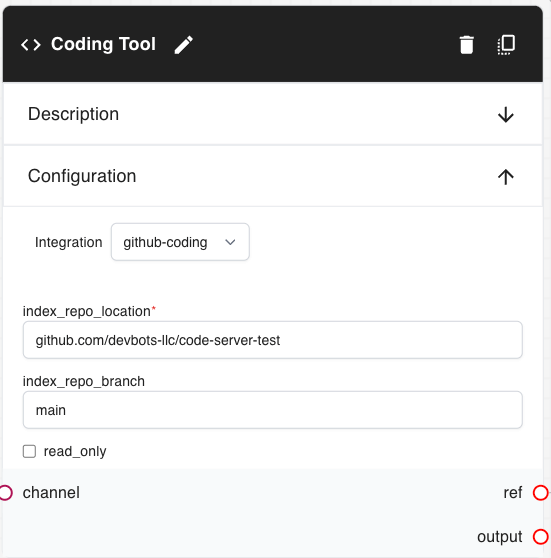
Coding Tool: The coding tool points to a github repository that contains all of the code for the project. It also grants us access to a dedicated collaboration space for each task.
We attach this as a tool to the task, which lets workers access the codebase and make changes.
-
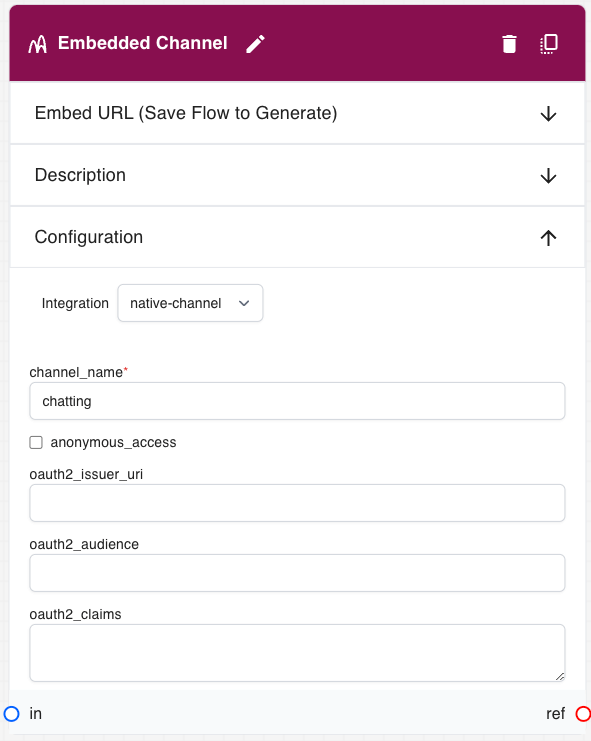
Embedded Channel: The embedded channel is our universal, embeddable channel that can be used to communicate with the user from within any application.
We add this as to the channel input of the tool, which lets workers and users communicate in real-time.
-
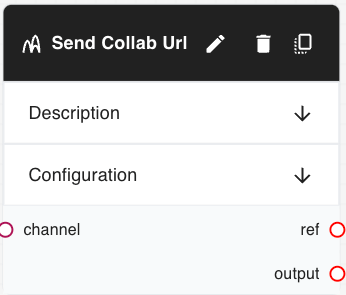
Send Collab URL: The worker can use this tool to send a collaboration URL to a colleague.
We add this as a tool to the task, which lets workers send a message in an attached channel.
-
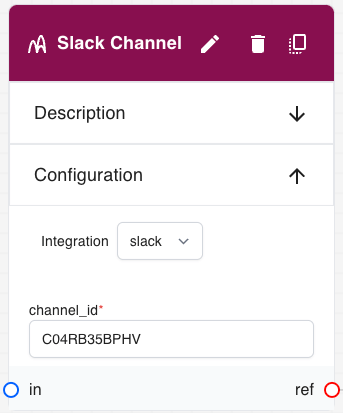
Slack Channel: The Slack Channel controls where the collaboration URL is sent.
We add this as a channel to the send collab URL tool.
-
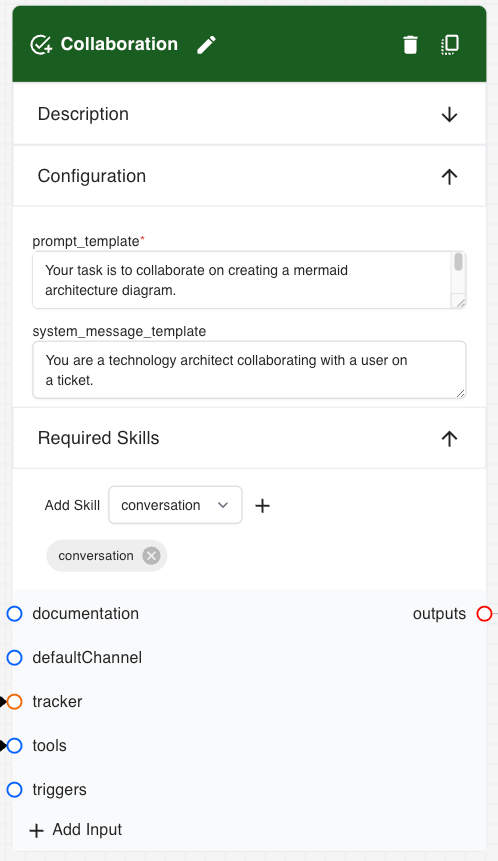
Collaboration: The collaboration task describes to the worker how to complete the task.
The task is automatically assigned to a worker with the appropriate skills and availability at execution time.
-
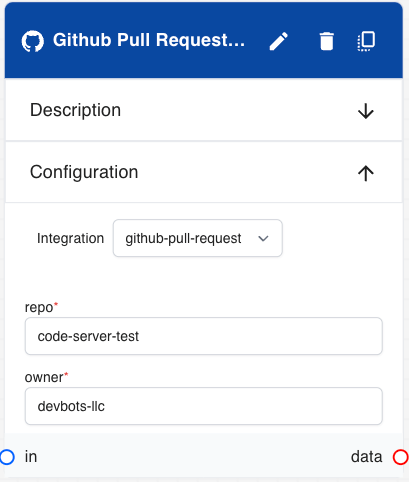
Github Pull Request: When the task is complete, the worker will create a pull a request automatically.
We add this as an output to the collaboration task, which indicates that the task is complete when the pull request is created.
And you’re done!
Click the enable button and your process is ready to go.
Let’s dive in and see how this flow works in practice.
Step 1: Add a ticket to the Architecture Board
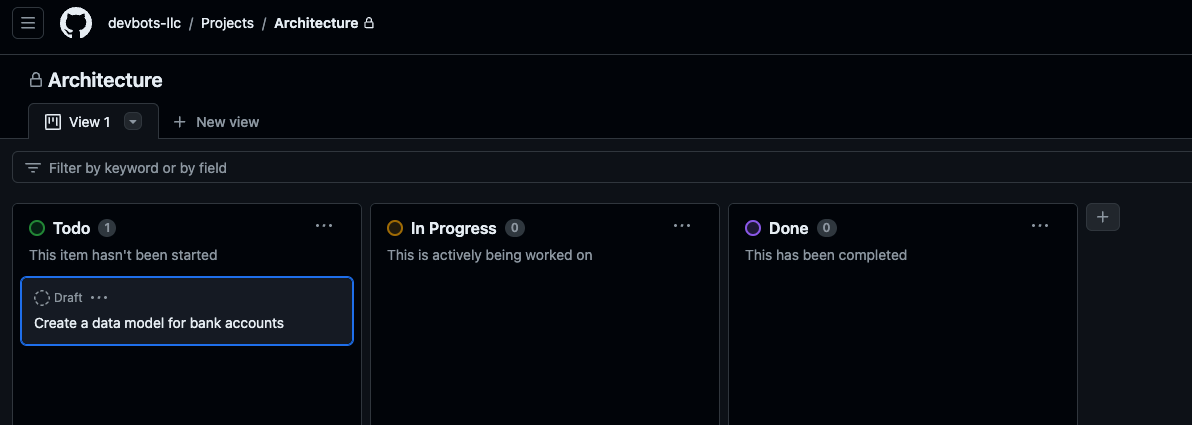
Whenever a ticket is added to the Architecture Board, a new task is added to the internal task queue. An AI worker tagged with the appropriate skills is then automatically assigned to the task.
The ticket could have been created by a human, or by an AI worker as the output of another task.
Step 2: Worker picks up the task
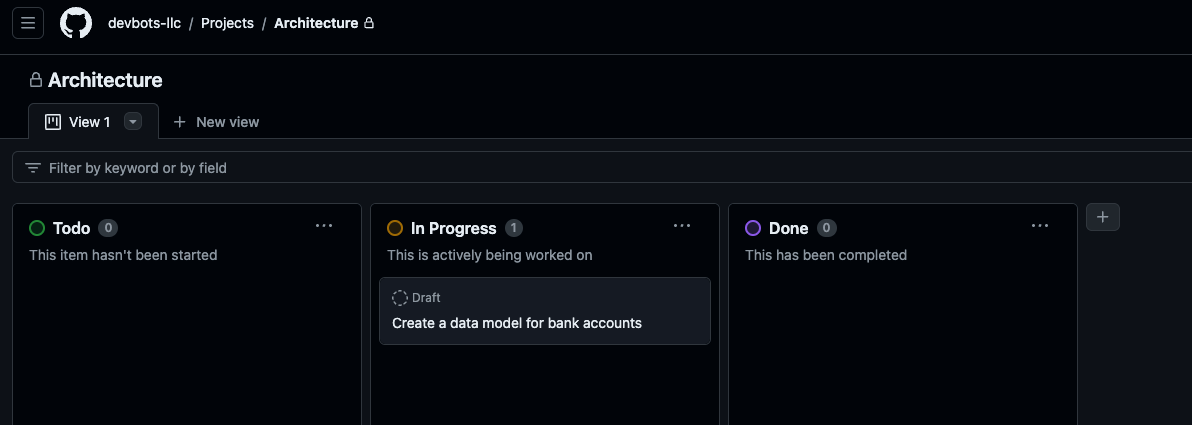
As soon as the worker picks up the task, it automatically moves to the “In Progress” column. The worker can now begin working on the task.
Step 3: Worker sends a collaboration URL
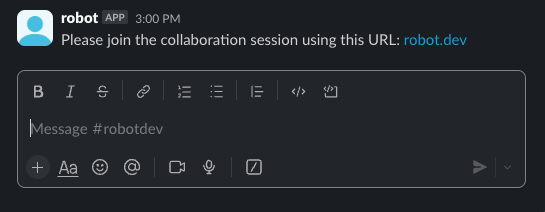
As soon as the collaboration space is ready, the worker sends a collaboration URL to the user. This URL points to a shared coding environment where both the user and the AI worker have full access to the code.
Any number of users can join the collaboration space, but only one AI worker is assigned to the task.
Step 4: Worker and users collaborate on the task
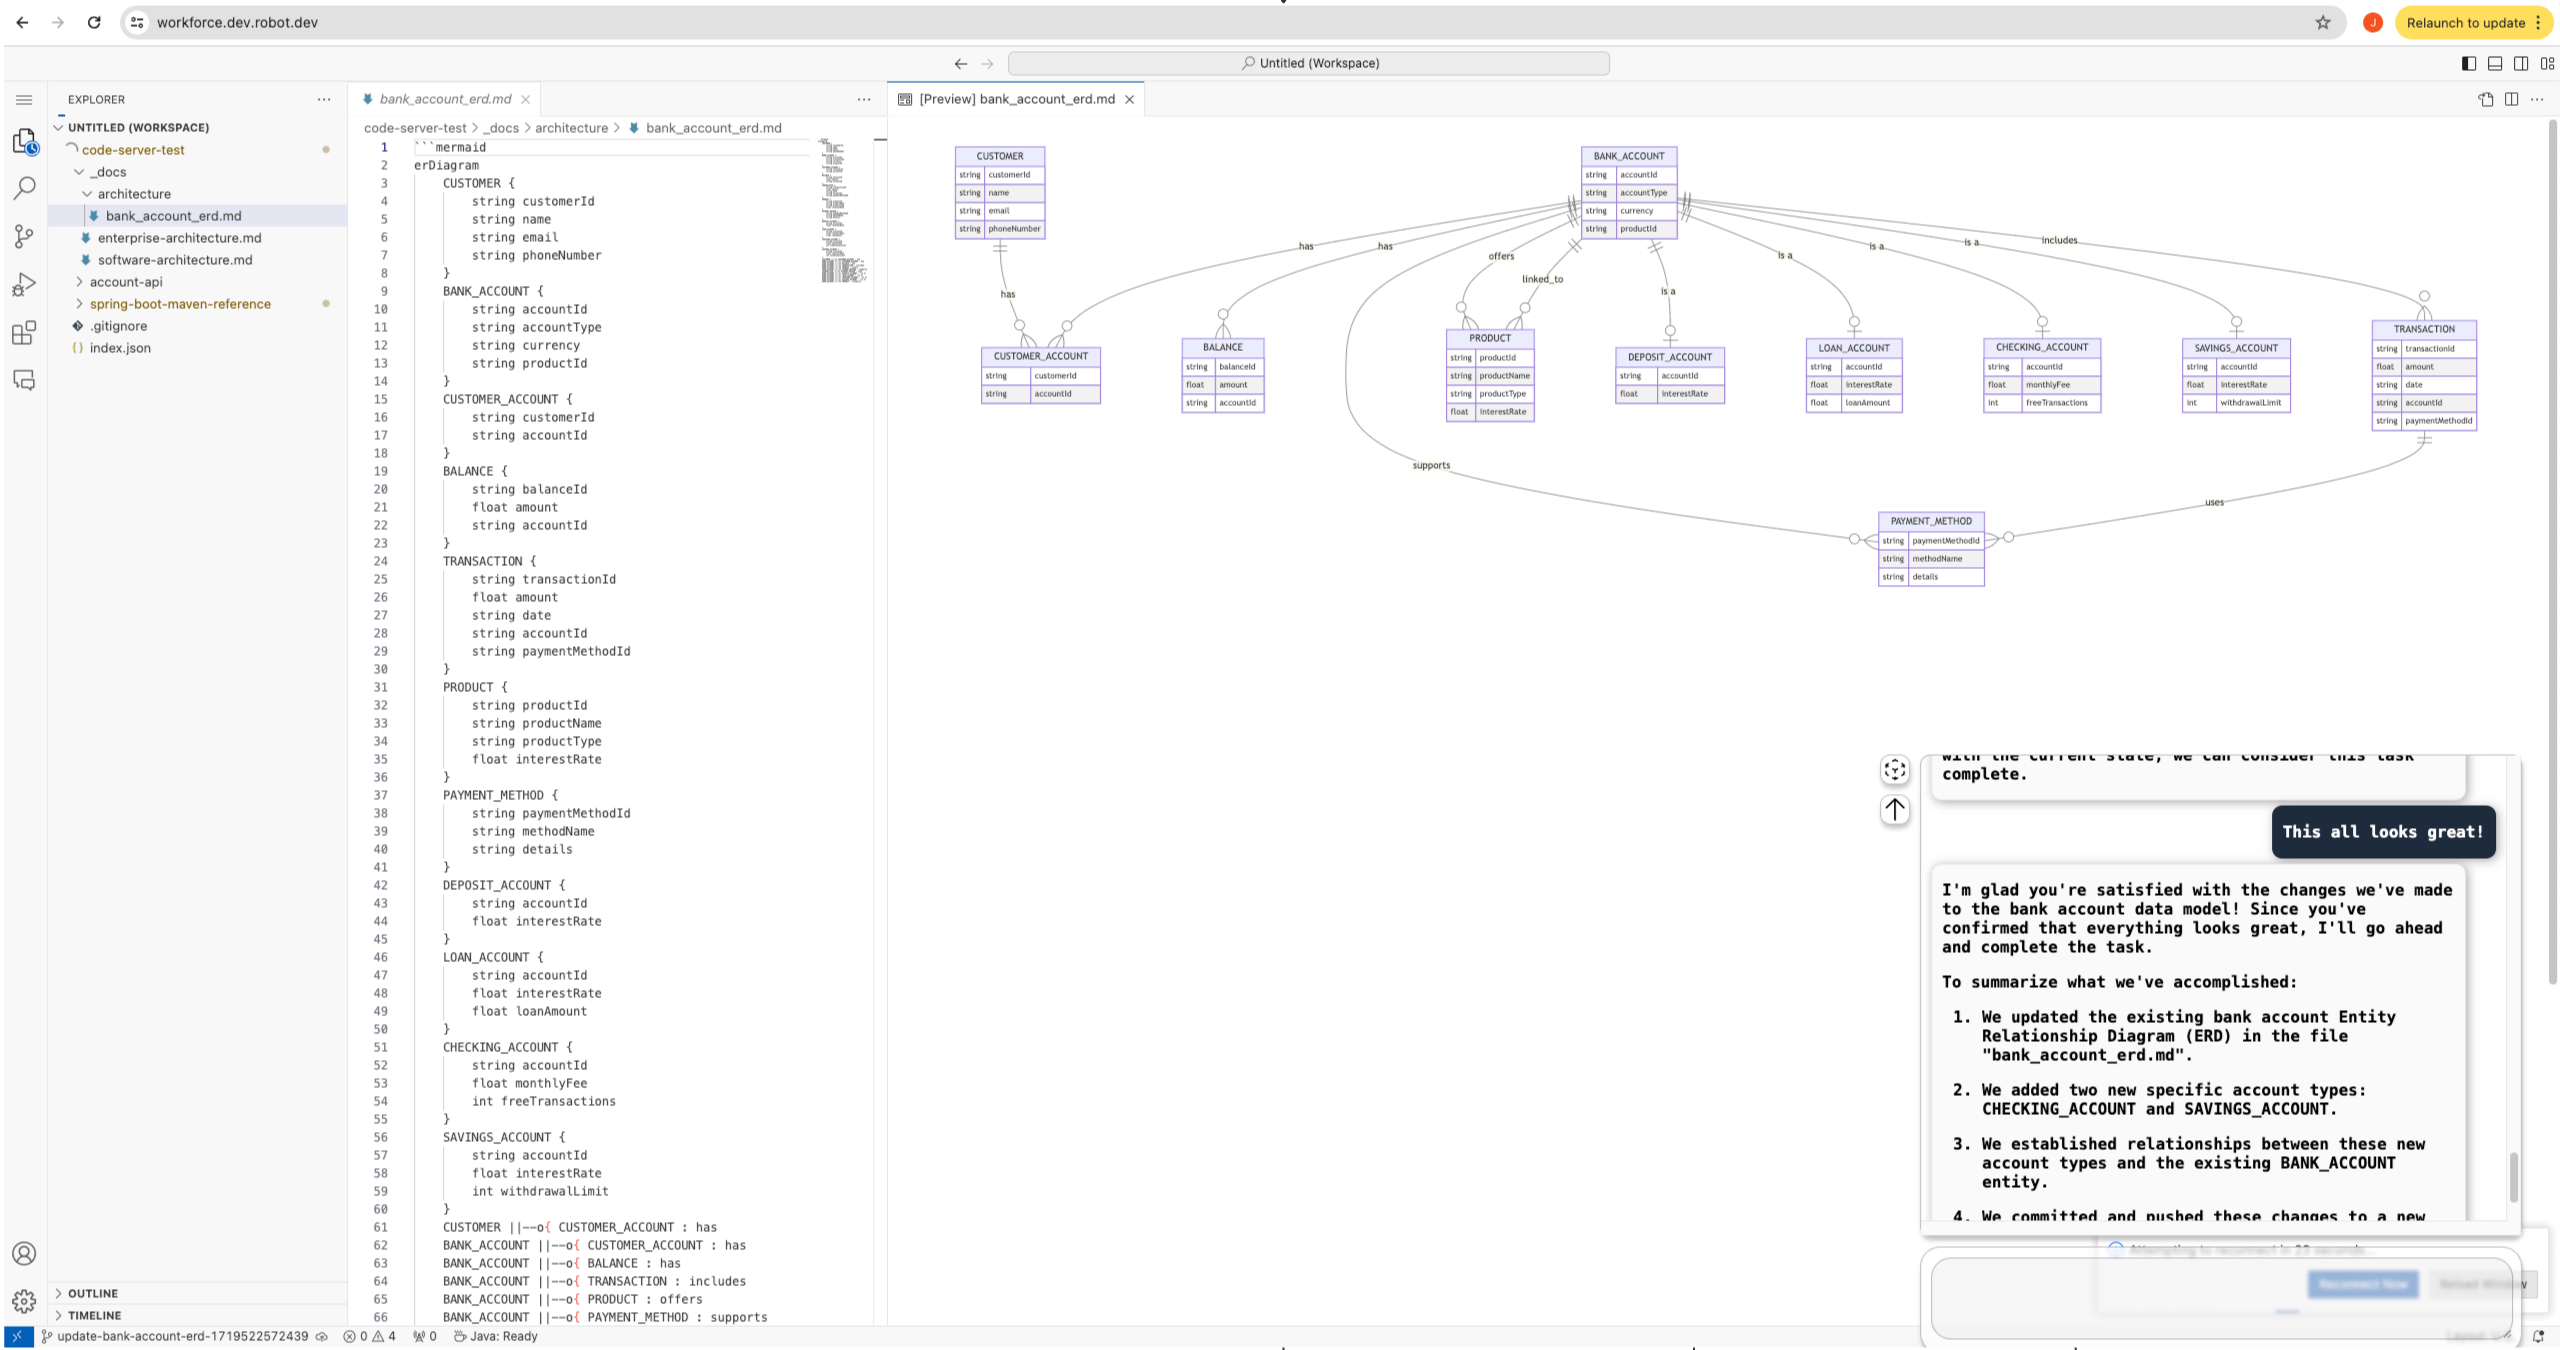
The collaboration space is a fully-featured IDE that has all of the tools necessary to complete the task.
The AI worker has access to the following:
- Git Repository: The AI worker can clone the repository, make changes, and push them back to the repository.
- Chat Channel: The AI worker can communicate with the user in real-time.
- Code Editor: The AI worker can browse the codebase, and make changes directly to the code.
We find it’s best to let the AI do the driving, while users provide feedback and guidance.
The worker will make sure that you approve of the changes before it makes any commits.
As soon as the task is complete, the collaboration space is automatically destroyed, so you don’t have to worry about any lingering resources.
Step 5: Worker commits changes
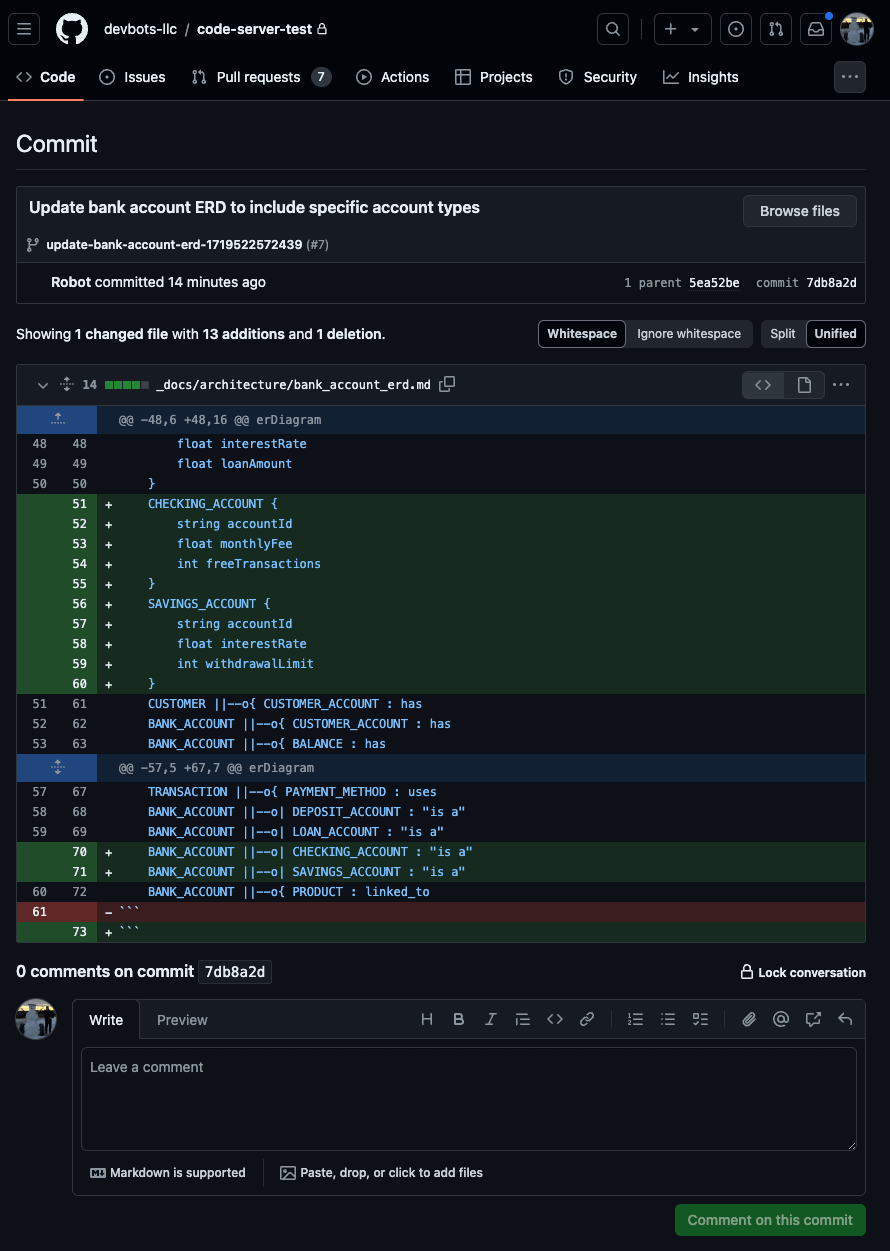
Once the worker has validated the changes with the user, it will commit the changes to a new branch in the repository.
Step 6: Worker creates a pull request
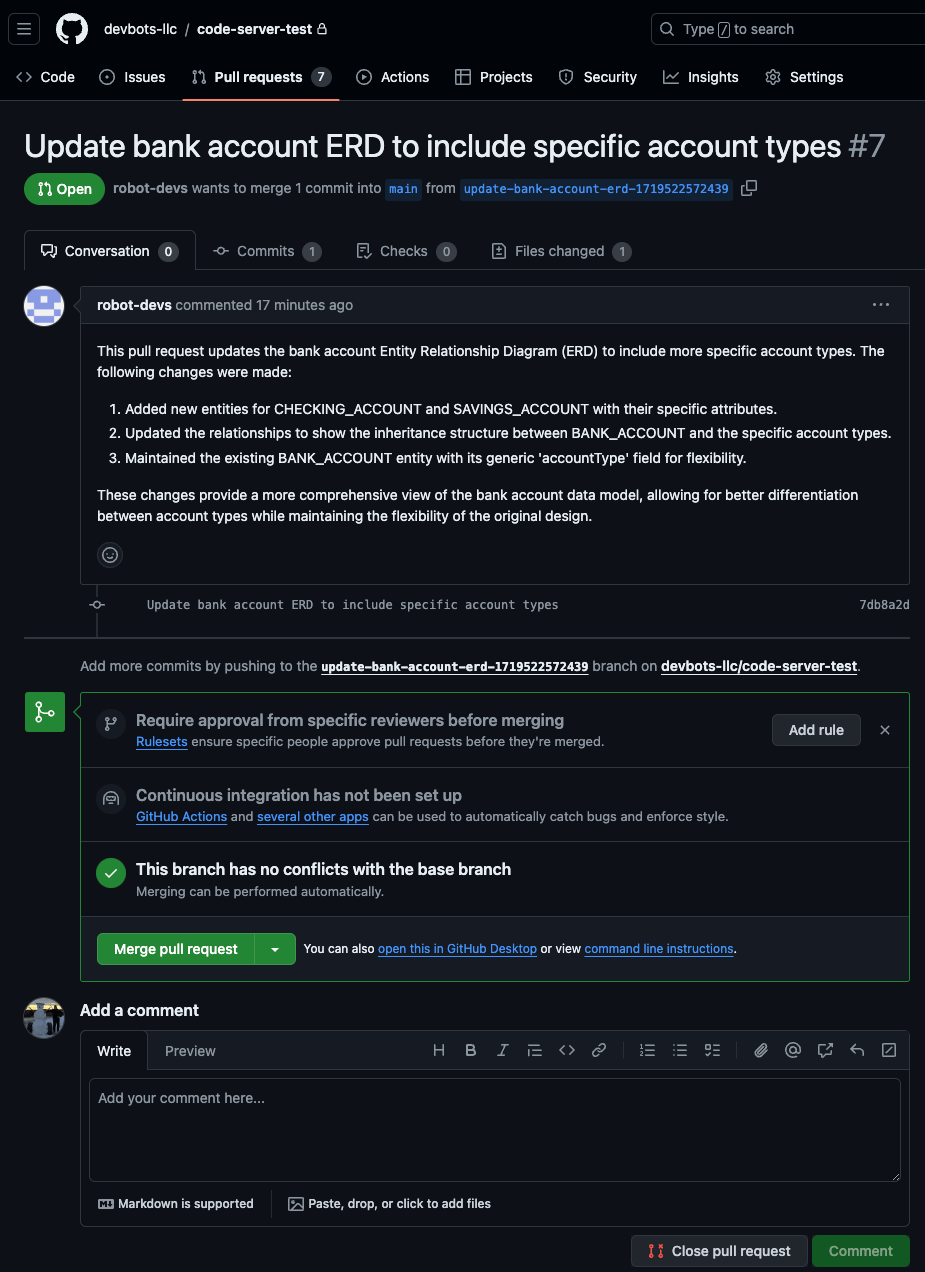
Immediately after the worker commits the changes, it will create a pull request in the repository. This pull request will contain all of the changes that were made during the collaboration session, along with a detailed description of the changes.
Step 7: Worker moves the ticket to the “Done” column
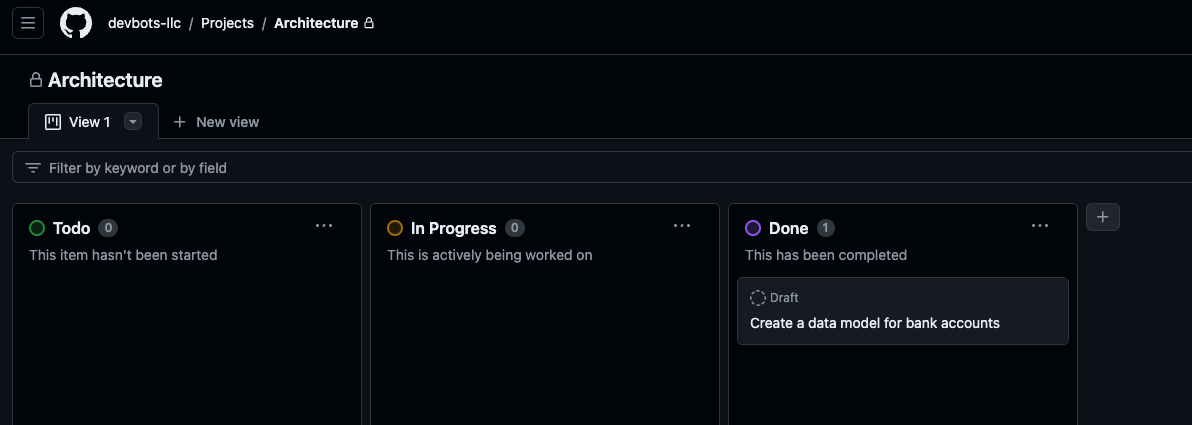
Once the pull request has been created, the worker will move the ticket to the “Done” column. The user can now review the changes and merge the pull request.
Conclusion
In this guide, we’ve shown how you can use Workforce to streamline a version-controlled, collaborative, and ticket-driven architecture workflow.
The key benefits of this approach are:
- Streamlined Workflow: By using Workforce, your human worker can do what they do best, while the AI worker greases the wheels.
- Collaboration: By using a shared coding environment, you can easily collaborate with your colleagues on architecture tasks.
- Version Control: By using a version-controlled repository, you can easily see what’s changed, who changed it, and when it was changed.
- Ticket-Driven: By using a ticketing system, you can easily see what’s being worked on, what’s been completed, and what’s coming up.
This flow is powerful, but it barely scratches the surface of what’s possible with Workforce. From automating repetitive tasks to orchestrating complex workflows, Workforce can help you get more done in less time.
Stay tuned for more guides on how to use Workforce to integrate AI into your workflows and supercharge your productivity!
And don’t forget to sign up for the beta!
